Hello everyone,
It has been a while since my last post. We all know RabbitMQ service is present in the Magento community for some time but with recent versions, it became standard for any serious production store equally or not even the same as ElasticSearch. So what RabbitMQ is? RabbitMQ is open-source message-broker software that originally implemented the Advanced Message Queuing Protocol and has since been extended with a plug-in architecture to support Streaming Text Oriented Messaging Protocol, MQ Telemetry Transport, and other protocols.
Message queues provide an asynchronous communications mechanism in which the sender and the receiver of a message do not contact each other. Nor do they need to communicate with the message queue at the same time. When a sender places a message onto a queue, it is stored until the recipient receives them.
In Magento, the Message Queue Framework (MQF) is a fully-functional system that allows a module to publish messages to queues. It also creates consumers to receive them asynchronously. The MQF primarily uses RabbitMQ as the messaging broker, which provides a scalable platform for sending and receiving messages. It also includes a mechanism for storing undelivered messages. RabbitMQ is based on the Advanced Message Queuing Protocol (AMQP) 0.9.1 specification.
A basic message queue system can also be set up without using RabbitMQ. In this system, MySQL adapter stores messages in the database. Three database tables (queue, queue_message, and queue_message_status) manage the message queue workload. Cron jobs ensure the consumers are able to receive messages. This solution is not very scalable. RabbitMQ should be used whenever possible.
In a MySQL adapter environment, when a message is published to multiple queues, create a single record in queue_message and multiple records in each queue_message_status: one for each queue. (A join on the queue, queue_message, and queue_message_status tables is required).
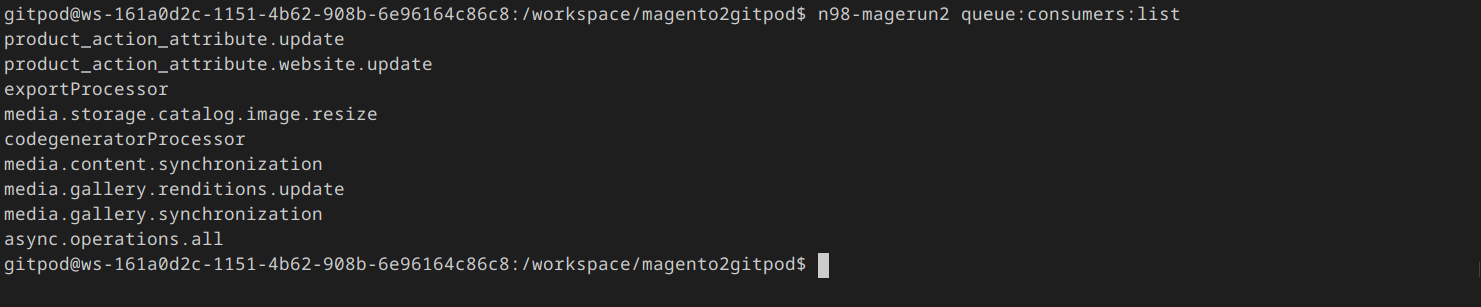
By default, only async.operations.all consumer is used by RabbitMQ service, but what is happening with the rest of consumers?
Magento DevDocs pages on https://devdocs.magento.com/guides/v2.4/extension-dev-guide/message-queues/message-queues.html#change-message-queue-from-mysql-to-amqp address explain with an example of how this can be accomplished by adjusting env.php file configuration that allows you to redefine the adapter for a topic.
'queue' => [
    'topics' => [
        'product_action_attribute.update' => [
            'publisher' => 'amqp-magento'
        ]
    ],
    'config' => [
        'publishers' => [
            'product_action_attribute.update' => [
                'connections' => [
                    'amqp' => [
                        'name' => 'amqp',
                        'exchange' => 'magento',
                        'disabled' => false
                    ],
                    'db' => [
                        'name' => 'db',
                        'disabled' => true
                    ]
                ]
            ]
        ]
    ],
    'consumers' => [
        'product_action_attribute.update' => [
            'connection' => 'amqp',
        ],
    ],
],
With small tweaks correct code that needs to be added to the env.php file became following:
'queue' => [
        'amqp' => [
            'host' => '127.0.0.1',
            'port' => '5672',
            'user' => 'guest',
            'password' => 'guest',
            'virtualhost' => '/'
        ],
        'consumers_wait_for_messages' => 1,
        'topics' => [
        'product_action_attribute.update' => [
            'publisher' => 'amqp-magento'
        ]
    ],
    'config' => [
        'publishers' => [
            'product_action_attribute.update' => [
                'connections' => [
                    'amqp' => [
                        'name' => 'amqp',
                        'exchange' => 'magento',
                        'disabled' => false
                    ],
                    'db' => [
                        'name' => 'db',
                        'disabled' => true
                    ]
                ]
            ]
        ]
    ],
    'consumers' => [
        'product_action_attribute.update' => [
            'connection' => 'amqp',
        ],
    ],
],
- You may notice that we have just updated block with correct amqp values used for Magento 2 to connect to the RabbitMQ service.
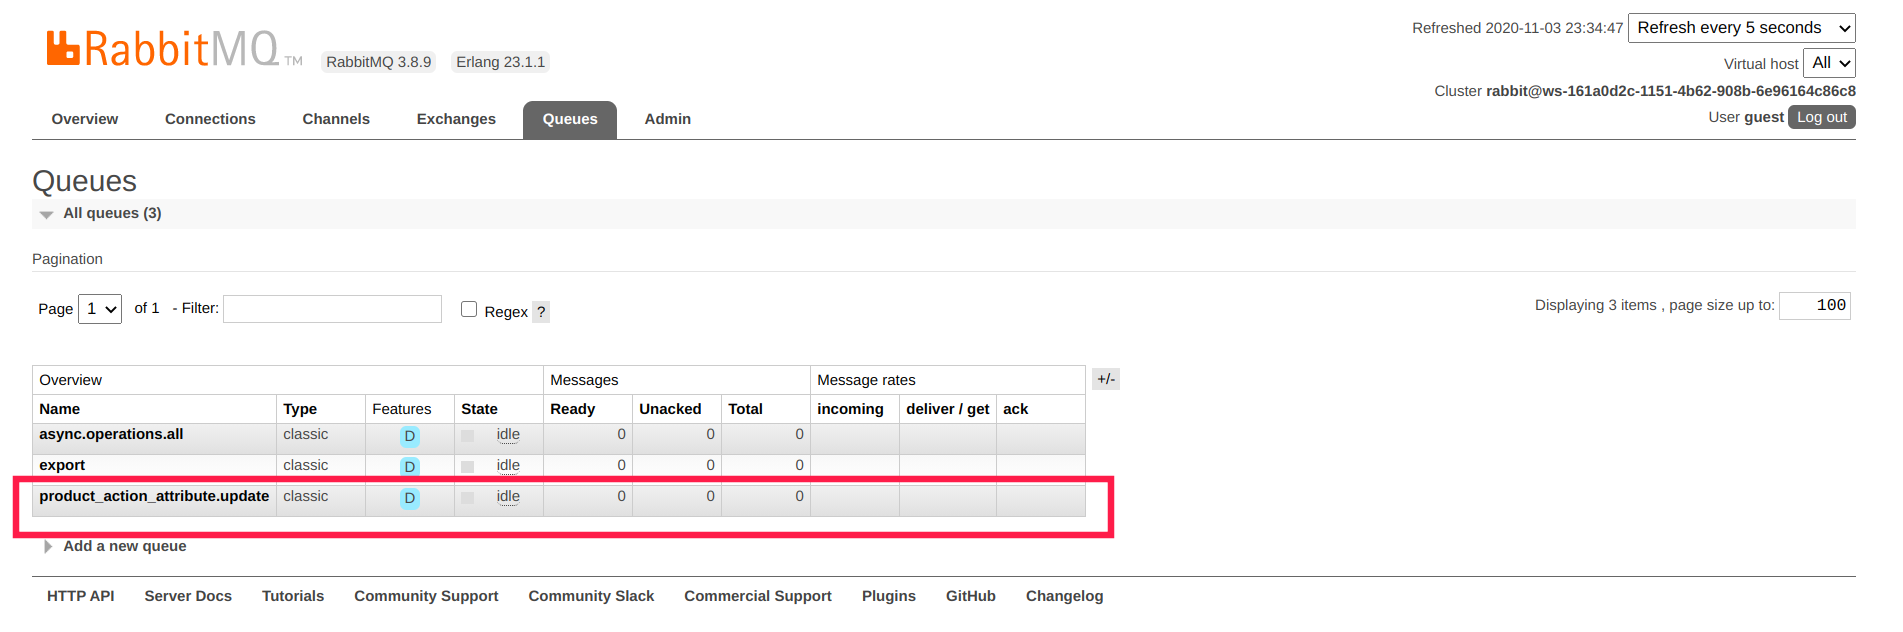
The most important note when converting MySQL adapter to AMQP is that each time added you need to push setup:upgrade because that is when Magento 2 creates correct Queue in RabbitMQ and test it. You can use rabbitmqctl tool or Web interface plugin to check when new queue is created.
Well, this was easy... we just copy/paste from Magento 2 dev docs example and surprisingly it works! Now, let's try to add the one mostly used when there is an external integration requirement, exportProcessor consumer used when products are exported.
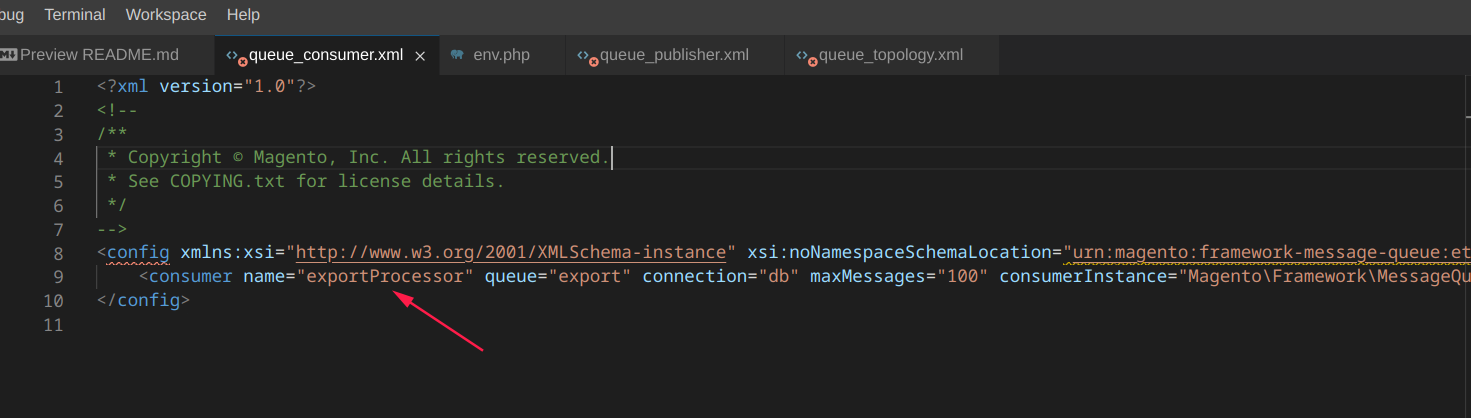
Module in charge is Magento 2 core module named ImportExport located in the app/code/Magento/ImportExport/ directory. We will open 3 files that instruct which adapter is used (MySQL or Amqp).
queue_consumer.xml
queue_publisher.xml
queue_topology.xml
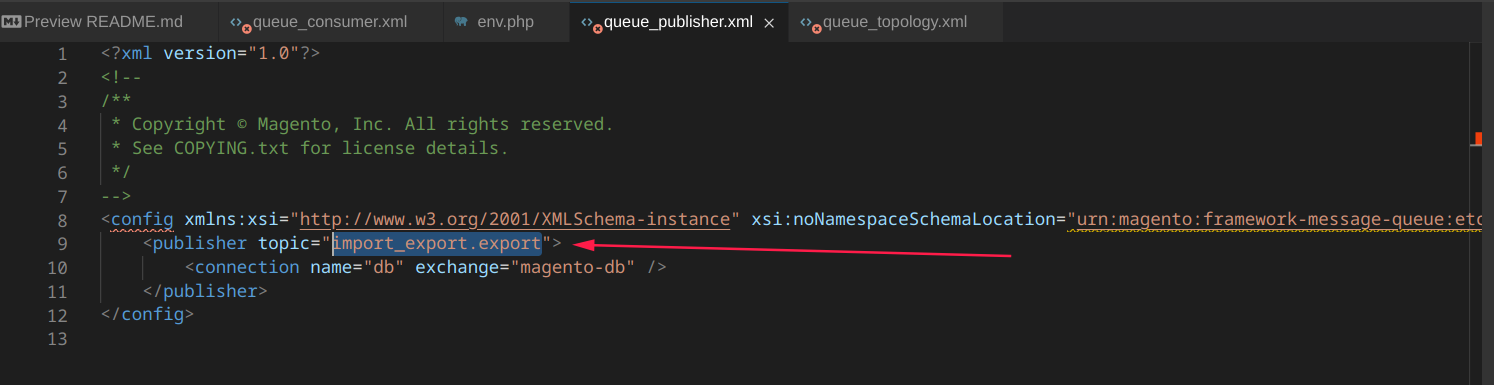
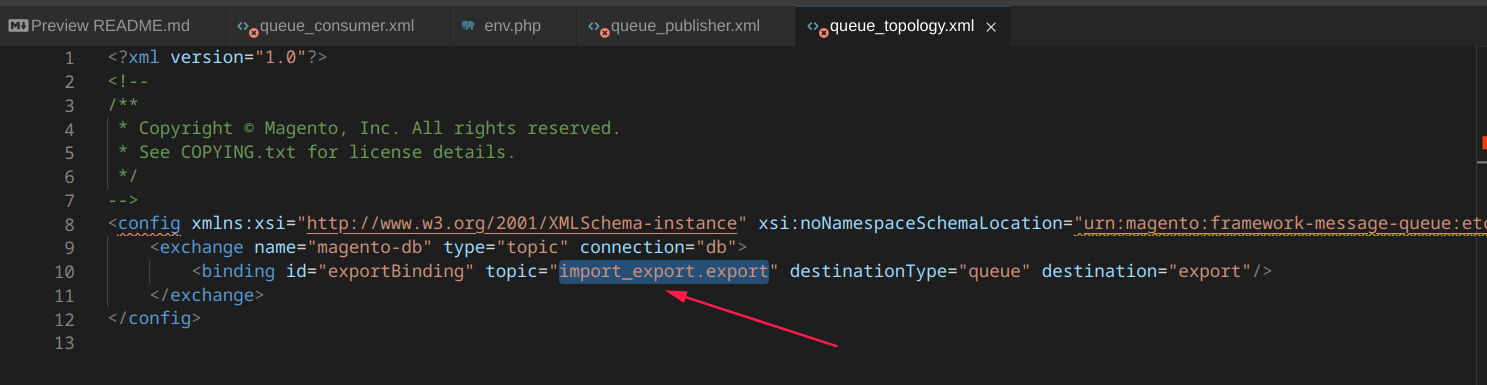
Based on these pieces of information we can now create variables for the env.php file:
    'queue' => [
        'amqp' => [
            'host' => '127.0.0.1',
            'port' => '5672',
            'user' => 'guest',
            'password' => 'guest',
            'virtualhost' => '/'
        ],
        'consumers_wait_for_messages' => 1,
        'topics' => [
            'import_export.export' => [
                'publisher' => 'amqp-magento'
            ]
        ],
        'config' => [
            'publishers' => [
                'import_export.export' => [
                    'connections' => [
                        'amqp' => [
                            'name' => 'amqp',
                            'exchange' => 'magento',
                            'disabled' => false
                        ],
                        'db' => [
                            'name' => 'db',
                            'disabled' => true
                        ]
                    ]
                ]
            ]
        ],
        'consumers' => [
            'exportProcessor' => [
                'connection' => 'amqp'
            ]
        ]
    ],
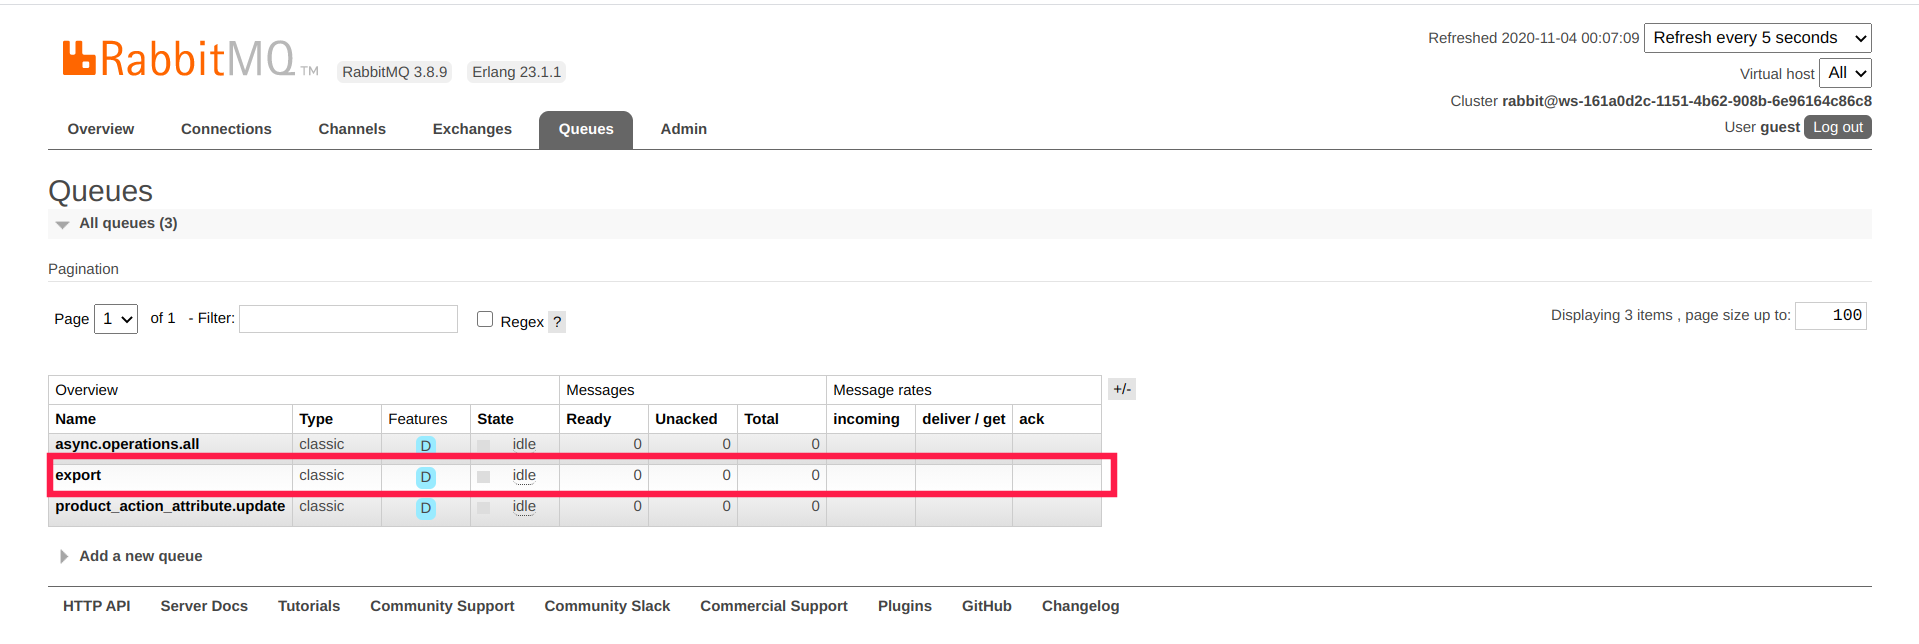
Once again we need to run setup:upgrade command so Magento 2 can generate a new queue named "export". Usually, this prompts at the end of setup:upgrade
2020-11-03 23:05:34.999 [info] <0.8343.0> closing AMQP connection <0.8343.0> (127.0.0.1:38132 -> 127.0.0.1:5672, vhost: '/', user: 'guest')
Push rabbitmqctl or web interface and you should see a new queue created:
Now, time to test and compare results. Based on the https://devdocs.magento.com/guides/v2.4/config-guide/cli/config-cli-subcommands-perf-data.html article we will generate data for a Medium profile store with 24,000 products.
$ php bin/magento setup:perf:generate-fixtures /workspace/magento2gitpod/setup/performance-toolkit/profiles/ce/small.xml
Generating a profile with the following params:
 |- Admin Users: 50
 |- Websites: 3
 |- Store Groups Count: 3
 |- Store Views Count: 3
 |- Categories: 300
 |- Attribute Sets (Default): 3
 |- Attribute Sets (Extra): 30
 |- Simple products: 24000
 |- Configurable products: 640
 |- Product images: 1000, 3 per product
 |- Customers: 2000
 |- Cart Price Rules: 20
 |- Catalog Price Rules: 20
 |- Coupon Codes: 20
 |- Orders: 50000
Config Changes...  done in 00:00:00
Generating admin users...  done in 00:00:07
Generating websites, stores and store views...  done in 00:00:04
Generating categories...  done in 00:00:58
Generating attribute sets...  done in 00:00:24
Generating simple products...  done in 00:05:46
Generating configurable EAV variations...  done in 00:00:00
Generating bundle products...  done in 00:00:00
Generating configurable products...  done in 00:02:30
Generating images...  done in 00:03:52
Generating customer groups...  done in 00:00:00
Generating customers...  done in 00:01:06
Generating cart price rules...  done in 00:00:19
Generating catalog price rules...  done in 00:00:18
Generating tax rates...  done in 00:07:07
Generating tax rules...  done in 00:00:00
Generating coupon codes...  done in 00:00:00
Generating orders...  done in 00:08:10
Indexers Mode Changes...  done in 00:00:01
Design Config Grid index has been rebuilt successfully in 00:00:00
Customer Grid index has been rebuilt successfully in 00:00:02
Category Products index has been rebuilt successfully in 00:00:21
Product Categories index has been rebuilt successfully in 00:00:00
Catalog Rule Product index has been rebuilt successfully in 00:00:56
Product EAV index has been rebuilt successfully in 00:00:22
Stock index has been rebuilt successfully in 00:00:19
Product Price index has been rebuilt successfully in 00:00:36
Catalog Product Rule index has been rebuilt successfully in 00:00:00
exception: Catalog Search index is locked by another reindex process. Skipping.
Total execution time: 00:33:34
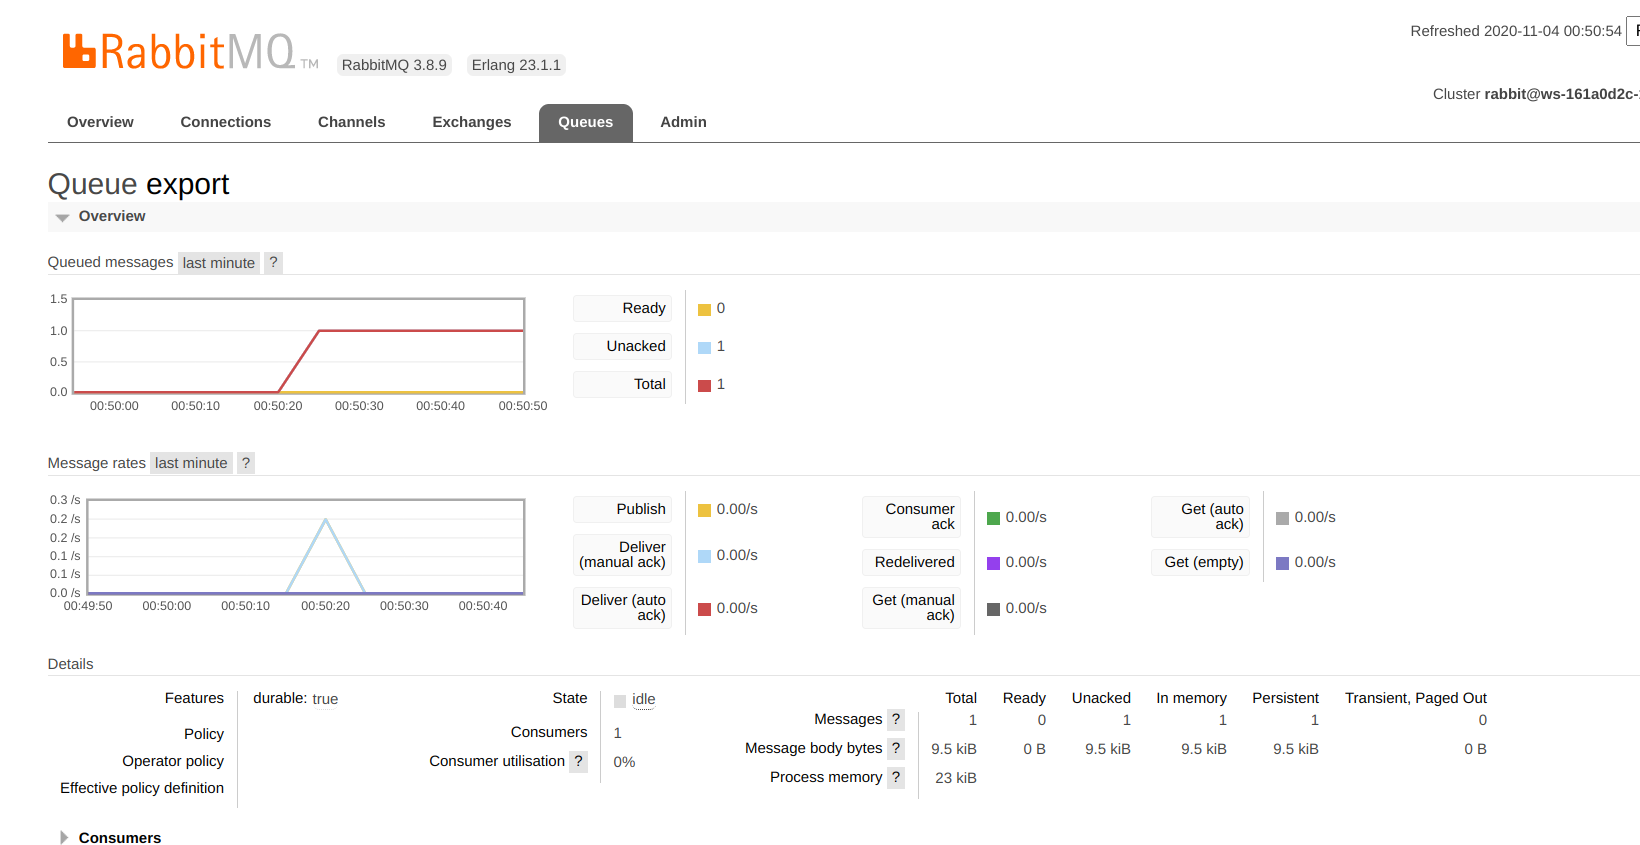
Since we are not running Crons here, we need to start exportProcessor consumer which detects when export is initiated and start creating file. We will also monitor RabbitMQ and see when messages are processed.
$ n98-magerun2 queue:consumer:start exportProcessor
Next is to jump to the Dashboard System --> Export area and initiate export for all products.
From this point, you can watch the RabbitMQ Web interface or from CLI
There are several useful options
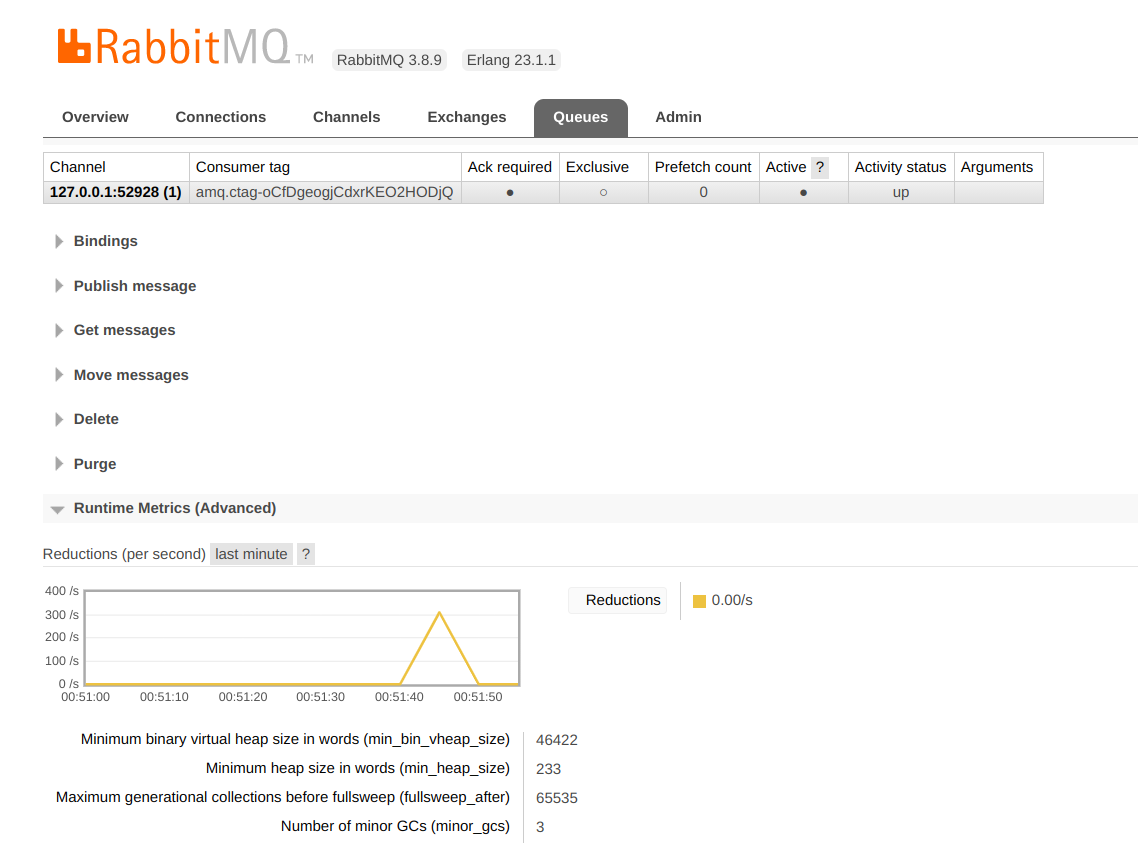
Plus you can watch and see that the exportProcessor process is using a lot of CPU memory:

Timings are clearly in favor of RabbitMQ. You can use https://github.com/nemke82/magento2gitpod fully functional Magento 2 setup and test with RabbitMQ and MySQL from your local computer using any popular browser.
Hope this article helps. Cheers.